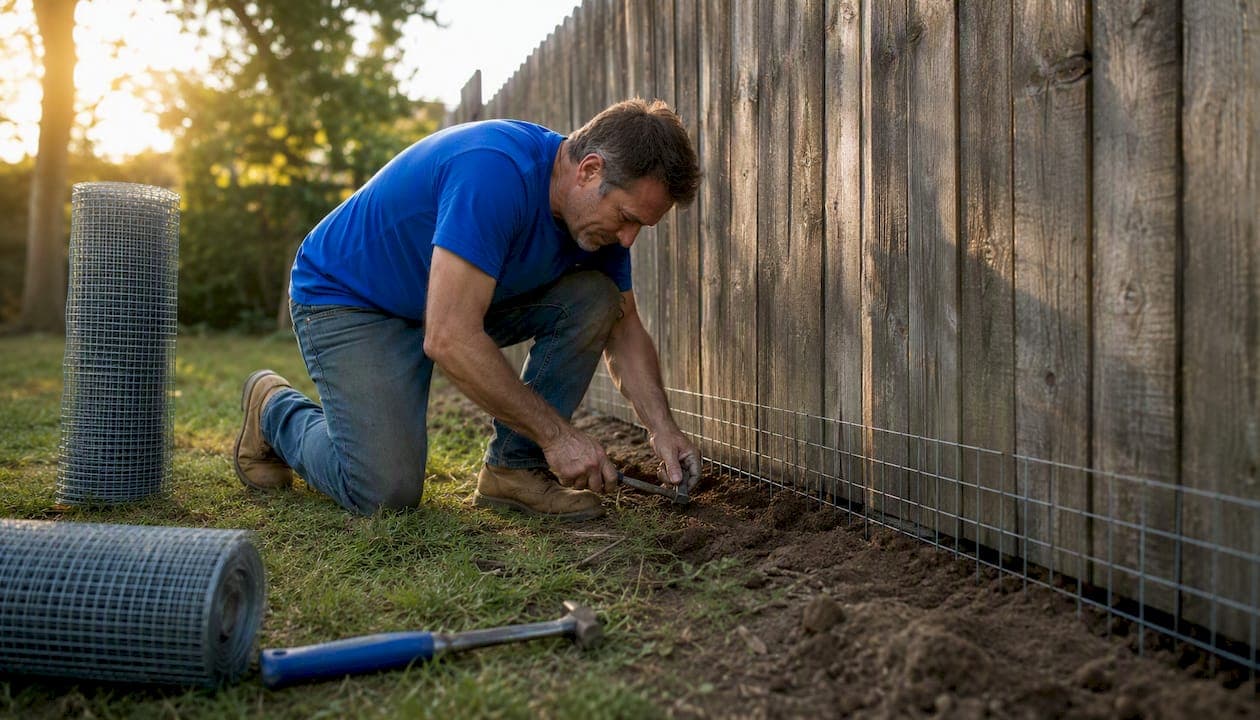
The fastest reliable way to stop a dog from digging under a fence is a continuous buried L-footer (also called a buried apron), paired with behavior changes to address why the dog is digging in the first place. For a quicker, lower-cost fix, a commercial no-dig barrier kit or rigid bottom panel buys time while you plan a permanent solution.
Here are the three most reliable options, ranked by long-term effectiveness:
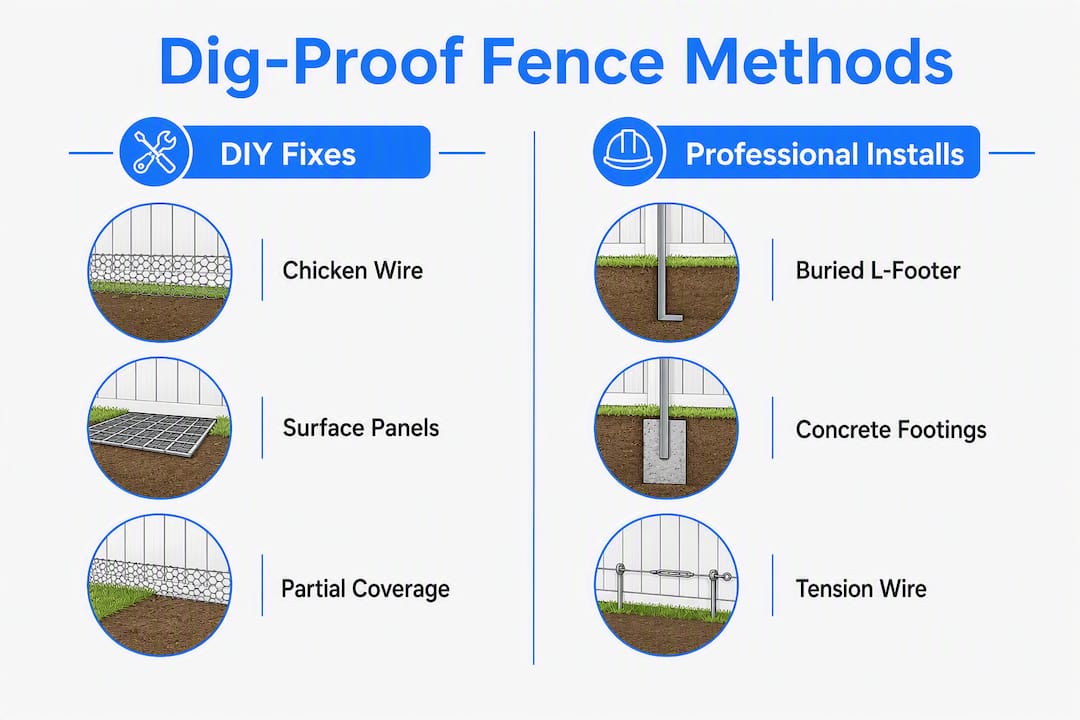
- Full buried L-footer + behavior fixes — the gold standard. A continuous mesh apron buried 4–6 inches deep (deeper in sandy soil) along the entire fence line stops even determined diggers. Pair it with exercise and enrichment for lasting results.
- Commercial no-dig barrier panels or a no-dig kit — welded steel drive-in panels or heavy-gauge wire skirting install in hours, not days. Best for low- to medium-motivation diggers, renters, or spot repairs. Limited warranty coverage applies.
- Low-cost DIY skirting — pavers, pressure-treated 2x4 boards, or a chicken wire apron staked to the surface. Works for casual diggers and tight budgets, but a determined escape artist will find a way around a surface-only fix.
Pro Tip: Before spending anything, check where the holes are. Holes clustered near gates or along fence sections that face a street almost always signal escape motivation, not boredom. A dog digging to escape needs both a physical barrier and a behavior fix. A bored dog digging randomly in the yard often stops with more exercise alone.
Table of Contents
- Why do dogs dig at fence lines?
- What are no-dig kits and surface barrier panels?
- What are the cheapest DIY fixes that actually work?
- What do professionals use for a permanent dig-proof solution?
- How do you install an L-footer buried apron?
- What fixes work best for each fence type?
- When should you hire a professional?
- Key Takeaways
- What installers actually see in the field
- Advantagefencenj: professional dig-proof installs with a written warranty
- Useful sources for further reading
Why do dogs dig at fence lines?
Fence-line digging is most often escape-driven, not random. Once a dog succeeds in getting out, the behavior gets reinforced fast. Every successful escape makes the next attempt more likely, which is why patching one hole and calling it done rarely works.
The most common motivations, in rough order of frequency:
- Escape or chase instinct — the dog sees, hears, or smells something on the other side and wants to get to it.
- Breeding urges — intact males and females in heat are among the most determined diggers. Spaying or neutering significantly reduces this.
- Boredom and pent-up energy — high-drive breeds (huskies, terriers, working dogs) dig when they don't have enough to do.
- Cooling — dogs dig into cool earth on hot days, usually in shaded spots, not necessarily at the fence line.
The location and pattern of digging tells you a lot. Escape-driven dogs dig near gates, corners, and fence sections that face a road or neighboring yard. Bored dogs dig anywhere, often in the middle of the yard. Seasonal spikes in late spring and summer often point to breeding urges or heat-seeking behavior.
Pro Tip: A simple triage: fill the hole, watch where the next one appears. If it's within a few feet of the original spot, you have an escape-motivated dog. If it's somewhere completely different, boredom or cooling is more likely. Physical fixes alone will hold an escape artist only if they cover the entire perimeter — a dog that finds any weak section will exploit it.
What are no-dig kits and surface barrier panels?
No-dig kits and surface barrier panels are pre-made fencing accessories designed to block digging without requiring a full trench. They typically consist of welded wire panels, drive-in steel stakes, or rigid mesh sections that attach to the base of an existing fence and extend outward or downward along the ground.
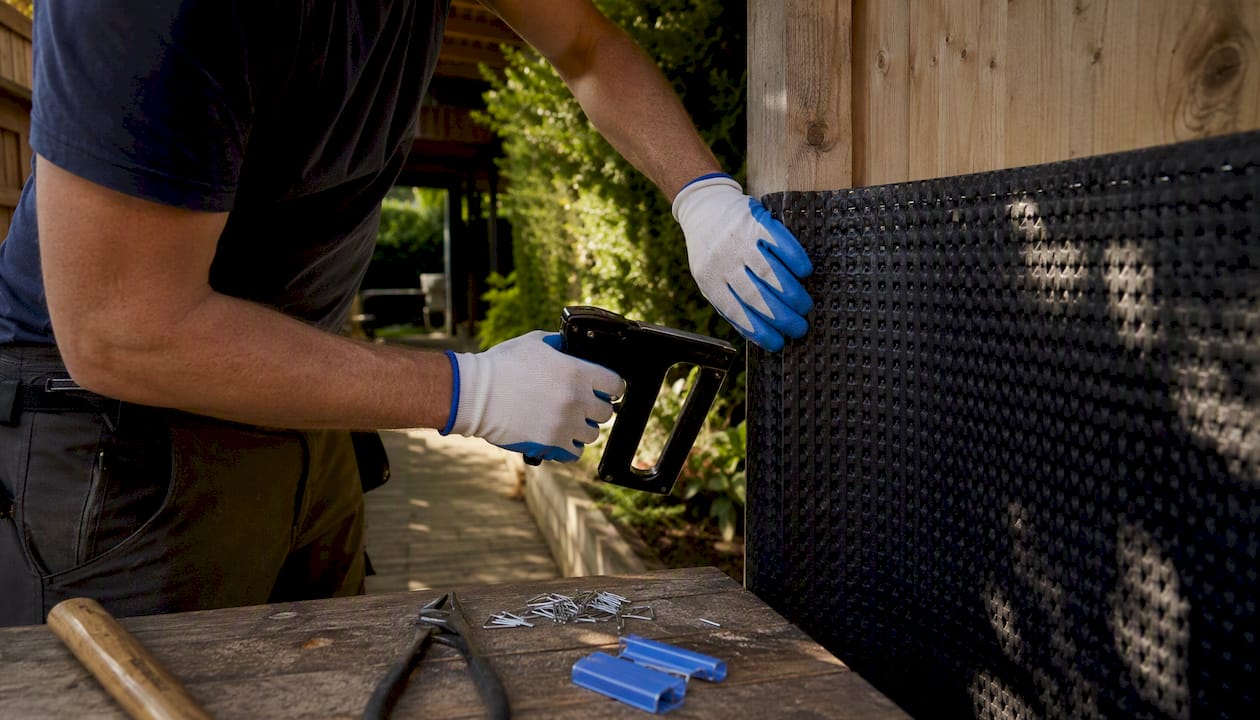
They work well for low- to medium-motivation diggers, renters who can't permanently modify a fence, or homeowners who need a fast fix while scheduling a more permanent install. A typical kit covers 10–25 linear feet and can be installed in an afternoon with basic tools.
Pros and cons:
- Pro: Fast installation, no digging required, widely available at hardware stores.
- Pro: Heavy-duty welded steel drive-in panels offer the best durability among surface kits.
- Pro: Removable and reusable, which matters for renters.
- Con: Surface-only panels can be pushed aside or pried up by a strong, persistent dog.
- Con: Aesthetics vary. Exposed wire mesh along a fence base isn't always attractive.
- Con: Product warranties on no-dig kits are typically limited (often 1 year on hardware, sometimes less). Most require periodic inspection to confirm stakes haven't shifted.
On the containment vs. security question: invisible electric fences are a lower-cost, low-profile alternative, but they contain your dog without blocking other animals from entering your yard. A physical barrier does both. For households with small children or in areas with wildlife, a physical anti-dig fence is the safer call.
No-dig kits make the most sense for: small yards, rented properties, temporary fixes during training, or spot repairs on an otherwise solid fence line.
What are the cheapest DIY fixes that actually work?
Four low-cost tactics that genuinely reduce digging, ranked roughly from cheapest to most effective:
- Pavers or a rock apron — lay flat stones or concrete pavers along the inside base of the fence. Dogs dislike digging through rock. Cost: $1–$3 per square foot in materials, depending on stone type.
- Pressure-treated 2x4 skirting — screw horizontal boards along the fence base to create a physical barrier. Works well for wood fences. Cost: roughly $0.50–$1.50 per linear foot in lumber.
- Landscape edging — heavy-gauge metal or rigid plastic edging driven 4–6 inches into the ground along the fence line. Cheap and fast, but less effective against strong diggers.
- Buried chicken wire L-apron — the most effective DIY option. Extends mesh horizontally underground so the dog hits wire when it digs down.
How to install a chicken wire L-apron (DIY)
Materials checklist for a 50–100 ft run:
- 2-inch galvanized chicken wire or welded wire mesh (48-inch wide roll)
- Wire staples or U-clips
- Landscape staples (6-inch)
- Gravel or topsoil for backfill
- Gloves, wire cutters, hand tamper
Steps:
- Mark a line 12 inches out from the fence base along the inside of the yard.
- Dig a shallow trench 4–6 inches deep along the fence base (deeper if your soil is sandy or loose).
- Cut the mesh roll to length. Bend the bottom 12 inches outward at a 90-degree angle to form the "L."
- Lay the vertical section against the fence base and staple it to fence posts or boards every 12–18 inches.
- Lay the horizontal section flat in the trench, facing inward (toward the yard).
- Backfill with gravel or soil and compact firmly. Tamp down the surface so there's no visible gap.
- Inspect the full run for gaps, especially at corners and gate posts.
Time and cost estimate: A 50-foot run takes roughly 3–5 hours for one person. Materials typically run $50–$150 depending on mesh quality and whether you use gravel or existing soil for backfill.
The honest limit of this approach: chicken wire degrades faster than welded mesh, and a strong dog can eventually push through a surface-only installation. For a dog that has already escaped multiple times, move straight to the permanent methods below.
What do professionals use for a permanent dig-proof solution?
Contractor-grade solutions go deeper, use heavier materials, and cover the full perimeter without gaps. Three main approaches:
L-footer with buried mesh apron — the most common professional fix for residential yards. A continuous welded wire or hardware cloth apron is buried along the entire fence base, bent at an L-shape so the horizontal section faces inward. A continuous apron prevents dogs from simply moving to a nearby weaker spot — the single most common failure mode of DIY patch fixes.
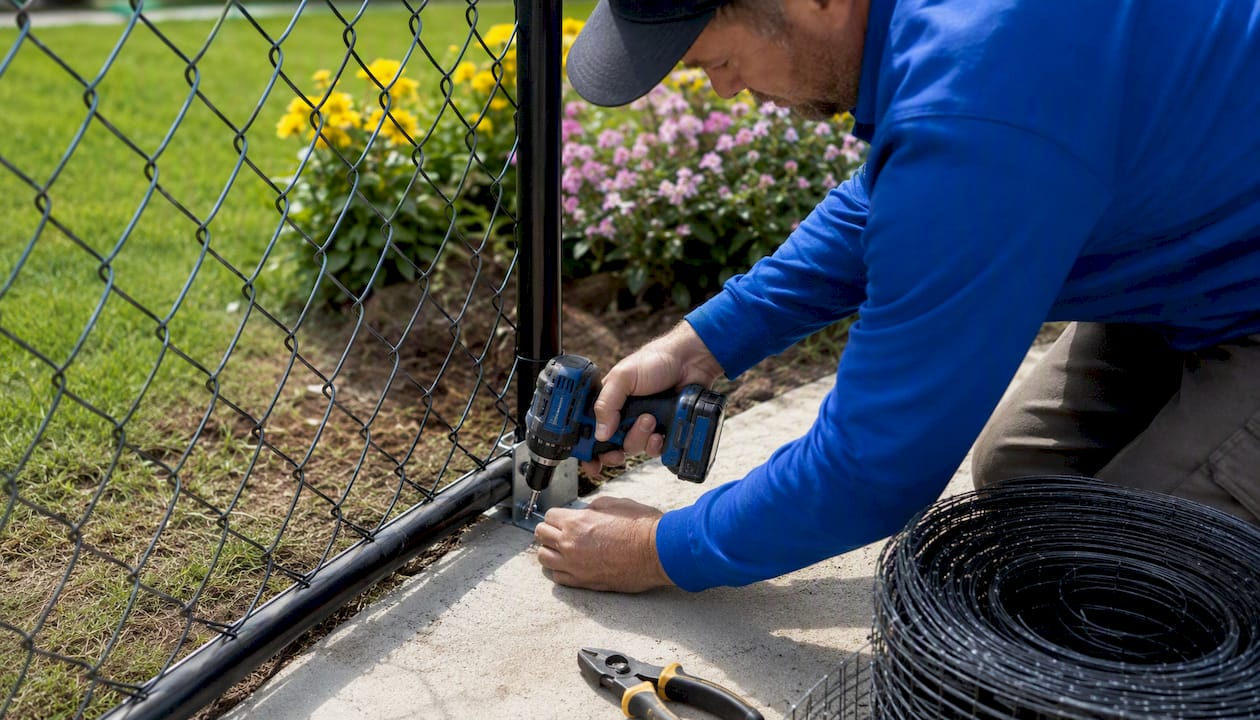
Concrete footings — used in extreme soil conditions (very sandy, loose, or high-water-table areas) where buried mesh alone won't stay in place. More expensive but essentially permanent.
Bottom tension wire or rigid bottom rail (chain-link) — adding a bottom tension wire or rigid bottom rail to chain-link removes the mesh flex that lets dogs pry their way under. This is always paired with a buried apron for full protection.
| Method | Recommended burial depth | Material spec | Typical warranty | Relative cost |
|---|---|---|---|---|
| Buried mesh L-footer | 4–6 in. (up to 12 in. in loose soil) | Welded wire, 14–16 gauge | 1–5 years (contractor-dependent) | Low–Medium |
| Concrete footing | Full post depth | Poured concrete + mesh | 5–10 years | High |
| Bottom tension wire (chain-link) | Surface + buried apron | Galvanized steel tension wire | 1–3 years | Low |
| Drive-in steel panels | Surface only | Welded 4-gauge steel | 1–2 years (product) | Low–Medium |
On material grade: 14-gauge buried wire holds up significantly better than 20-gauge DIY wire against root damage, mower strikes, and burrowing pressure. Heavier gauge costs more upfront and saves considerably on repairs over a 5-year horizon.
Pro Tip: When reviewing a contractor quote, look for two things: (1) confirmation that the apron runs continuously along the full perimeter, including corners and gate posts, and (2) the wire gauge specified. A quote that says "mesh apron" without specifying gauge or burial depth is a red flag. Ask for both in writing.
How do you install an L-footer buried apron?
The goal is a continuous mesh barrier buried at least 4–6 inches deep, with the horizontal section facing inward so a dog digging down hits wire and stops. In loose or sandy soil, go deeper — up to 12 inches.
Materials and tools:
- Welded wire mesh or hardware cloth (14–16 gauge, 24–36 inches wide)
- Wire staples or fence clips
- Landscape staples (6-inch minimum)
- Gravel or compacted fill
- Spade or trenching tool, hand tamper, wire cutters, gloves
Before you start: Call 811 (the national "Call Before You Dig" service) to have underground utilities marked. This is free and required by law in most states. Don't skip it.
Installation steps:
- Mark the trench line — 4–6 inches out from the fence base, running the full perimeter.
- Dig the trench — 4–6 inches deep minimum; 8–12 inches in sandy or loose soil.
- Cut and shape the mesh — cut to length, then bend the bottom portion outward at 90 degrees to form the L-shape.
- Anchor the vertical section — staple or clip it to fence posts and boards every 12 inches. No gaps at corners.
- Lay the horizontal section flat — it should face inward (toward the yard), sitting in the trench bottom.
- Backfill and compact — fill with gravel or native soil, tamp firmly. No soft spots.
- Inspect corners and gate posts — these are the most common failure points. Add extra staples and overlap mesh sections by at least 6 inches at joints.
Timeline: A 50-foot run takes one person roughly 4–6 hours. A 100-foot perimeter is a full day of work. Factor in an extra hour if you hit roots or rocky soil.
When to stop and call a pro: If your yard has more than 150 feet of fence line, significant grade changes, or your dog has already escaped multiple times after a DIY fix, the time and material cost of a DIY install starts to approach a professional quote. Get the quote first.
What fixes work best for each fence type?
The right anti-dig approach depends on what your fence is made of. Here's the short version per material, then the detail.
- Chain-link: — Add a bottom tension wire or rigid bottom rail first, then pair it with a buried L-footer. One without the other leaves a weak point.
- Wood: Buried mesh L-footer stapled to the fence boards works well. Wood fencing allows easy stapling and provides a solid anchor surface.
Chain-link specifics:
Chain-link mesh floats at the bottom when there's no tension wire, which gives dogs a prying point. A rigid bottom rail or tension wire removes that flex entirely. Once the bottom is rigid, add the buried apron. Without both fixes, a strong dog can still push the mesh up and squeeze through, even if it can't dig under.
Pro Tip: For chain-link, run the tension wire first, then install the apron. If you do it in reverse, the apron gets in the way of tensioning the wire properly. Sequence matters.
For chain-link fencing and vinyl fencing, the fence material itself affects which anchoring method holds long-term. When in doubt about compatibility, a professional assessment saves a wasted afternoon.
When should you hire a professional?
Three clear signs that DIY isn't the right call:
- Your fence perimeter is longer than 150 feet. The labor alone on a full buried apron starts to rival a professional quote, and continuity errors are more likely over long runs.
- Your soil is sandy, rocky, or has significant grade changes. Both conditions make proper burial depth and compaction much harder to achieve without equipment.
- Your dog has already escaped after a DIY fix. A repeat escape means the barrier had a gap. Finding that gap and fixing it correctly is harder than starting fresh with a pro install.
What to expect from a reputable contractor:
- A site survey before quoting (not just a phone estimate)
- A written spec that includes mesh type, wire gauge, and burial depth
- Confirmation that the apron runs continuously, including corners and gate posts
- Permit assistance if your municipality requires it
- Cleanup and final inspection before sign-off
- A written warranty on both materials and labor
Advantagefencenj handles all of the above for residential and commercial properties. Their services page outlines the full scope of what's included in a professional install, from material selection through permitting assistance. When requesting a quote, have your yard footage, current fence type, and a few photos of the problem areas ready. That information cuts the back-and-forth and gets you an accurate number faster.
Key Takeaways
A continuous buried L-footer covering the full fence perimeter, paired with behavioral fixes like exercise and enrichment, is the most reliable long-term solution for stopping dogs from digging under a fence.
| Point | Details |
|---|---|
| Buried L-footer is the gold standard | Bury mesh 4–6 inches deep (up to 12 in. in loose soil) along the full perimeter for lasting results. |
| Behavior fixes are required too | Physical barriers work best when paired with exercise, enrichment, or training to address why the dog digs. |
| No-dig kits work for low-motivation diggers | Commercial surface panels install quickly but suit casual diggers and temporary fixes, not determined escape artists. |
| Material grade matters | 14–16 gauge welded wire outlasts lighter DIY mesh against roots, mower strikes, and persistent digging pressure. |
| Advantagefencenj for full-perimeter installs | Advantagefencenj provides professional L-footer installations with written material specs, warranty coverage, and permit assistance. |
What installers actually see in the field
The fix that holds across the most property types is a continuous welded-wire apron, buried properly and anchored without gaps at corners and gate posts. That's not a complicated insight, but it's the one that gets skipped most often.
The most common failure pattern is the patch fix. A homeowner fills a hole, adds a surface panel over that one spot, and considers it done. The dog moves six feet down the fence line and starts again. Then another patch goes in. After three or four rounds of this, the fence base looks like a patchwork quilt, and the dog is still getting out. The problem was never the individual hole. It was the absence of a continuous barrier.
The second most common mistake is insufficient burial depth. Stapling mesh to the surface, or burying it only 2 inches deep, gives a determined digger about a week before it figures out the workaround. Sandy or loose soil makes this worse. The 4–6 inch minimum exists for a reason, and in soft soil, 8–10 inches is the safer target.
The fixes that actually stand the test of time share two traits: they cover the full perimeter without exception, and they use materials heavy enough to resist sustained pressure. Welded wire at 14–16 gauge, properly buried and anchored, is still doing its job years later. Chicken wire stapled to the surface is not.
Advantagefencenj: professional dig-proof installs with a written warranty
Stopping a determined digger with a DIY fix is possible, but getting it right across a full fence perimeter takes time, the right materials, and zero gaps. Advantagefencenj installs continuous buried L-footer aprons as part of every dig-proof fence project, using contractor-grade welded wire and proper burial depths specified in writing before work begins.

Every install includes a site survey, full-perimeter coverage (corners and gate posts included), material specs in your quote, permit assistance where required, and a written warranty on both labor and materials. You're not guessing at gauge or depth. You're getting a documented installation that holds.
If your dog has already escaped, or you're planning a new fence and want dig protection built in from the start, request a quote from Advantagefencenj today. Have your yard footage, fence type, and a photo of the problem area ready, and the team will get back to you with an accurate estimate.
Useful sources for further reading
- How to Stop Dog Digging Under Fence — DogFence — detailed breakdown of digging motivations and behavioral pairing strategies.
- The Pros and Cons of Invisible Fences for Dogs — VCA Animal Hospitals — veterinarian-reviewed overview of electronic containment vs. physical fencing.